|
поискавой системы для электроныых деталей |
|
|
поискавой системы для электроныых деталей |
|
DCS-7316XFM-R датащи(PDF) 22 Page - Arista Networks, Inc |
|
|
|||||||||||||||||||||||||||||
DCS-7316XFM-R датащи(HTML) 22 Page - Arista Networks, Inc |
|
|
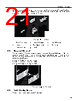
22 / 66 page  1. Installing the shelves. 2. Installing the mounting ears. 3. Placing and securing the switch upon the shelves. 3.2.3.1 Shelf Installation The installation process for each shelf is identical. The shelves must be installed on the same horizontal level. In the following section, inner side illustrations feature the left shelf and outer side illustrations feature the right shelf. Perform the following procedure for each shelf: 1. If applicable, verify that both locking mechanism latches on the shelf are open (Figure 6: Left Shelf – Inner View, insets A and B). Racks that do not require the locking mechanism, skip to Step 2. 2. Attach the front side of the shelf to its corresponding front rack post by inserting the shelf-side rack plugs and guide pins into post slots (Figure 10: Attaching the Right Shelf). The shelf ledge must be between the front posts. If the rack plugs were previously removed or not present, use bolts to attach the shelf to the rack, and skip to Step 4.. Figure 10: Attaching the Right Shelf 1 Right front rack post 2 Right shelf 3. Close the front locking mechanism latch (Figure 7: Right Shelf – Outer View). 4. Glide the slide-end to a position outside of its rear rack post (Figure 11: Adjusting the Right Shelf ). 18 |
|
ссылки URL |
| Вашему бизинису помогли Аллдатащит? [ DONATE ] |
Что такое Аллдатащит | реклама | контакт | Конфиденциальность | Ссылка на техническое описание | обмен ссыками | поиск по производителю All Rights Reserved©Alldatasheet.com |
| Russian : Alldatasheetru.com | Korean : Alldatasheet.co.kr | Spanish : Alldatasheet.es | French : Alldatasheet.fr | Italian : Alldatasheetit.com Portuguese : Alldatasheetpt.com | Polish : Alldatasheet.pl | Vietnamese : Alldatasheet.vn Indian : Alldatasheet.in | Mexican : Alldatasheet.com.mx | British : Alldatasheet.co.uk | New Zealand : Alldatasheet.co.nz |
|
Family Site : ic2ic.com |
icmetro.com |
 Russian ▼
 English
 Chinese
 German
 Japanese
 Russian
 Korean
 Spanish
 French
 Italian
 Portuguese
 Polish
 Vietnamese
 Indian
 Mexican
 British
 New Zealand